
I’ll never forget the first time I tasted a cookie that made me pause mid-bite. It wasn’t just sweet—it was an experience. Crisp edges giving way to a center so tender it nearly melted, with whispers of caramel swirling through every chew. That moment sparked my quest to recreate that magic, and what I discovered changed everything.

Most recipes promise perfection but deliver compromise. Too sugary. Too flat. Too forgettable. This version flips the script with a secret weapon: browned butter. When simmered until golden, it transforms into liquid gold—nutty, complex, and utterly irresistible. Paired with dark chocolate chunks and a sprinkle of flaky salt, it creates layers of flavor that dance on your tongue.
What makes these stand out? Balance. Less sugar lets the rich, toasty notes shine, while precise ratios ensure each batch bakes consistently. The result? Edges with a delicate crunch, centers that stay luxuriously soft for days, and that “just one more” pull we all crave.
This isn’t just another cookie formula. It’s a blueprint for creating moments—the kind that make kitchen counters sacred spaces and milk glasses mandatory accessories.
My Personal Journey to Perfect Cookies
Ten years ago, I set out on a quest that turned my oven into a test kitchen. Early batches of chocolate chip cookies spread too thin or tasted overly sweet. I realized traditional methods wouldn’t work with browned butter—its reduced moisture content demanded precise adjustments.

Through hundreds of trials, I discovered chilling the dough for exactly 48 hours created the ideal texture. Too little time? Flat discs. Too much? Dense bricks. The sweet spot let flavors deepen while controlling spread.
Balancing rich cocoa notes with toasted undertones proved tricky. I tested chunk ratios obsessively—55% dark pieces delivered bold flavor without overpowering. A sprinkle of flaky salt became the final puzzle piece, cutting sweetness and enhancing the butter’s complexity.
This formula isn’t guesswork. It’s a decade of burned edges, happy neighbors, and “just-right” moments distilled into one reliable guide. Now, every batch of chocolate chip cookies emerges with crackly edges, chewy middles, and layers that keep friends begging for the recipe.
Ingredients & Essential Equipment
Years of testing taught me one truth: cookie greatness starts with what you put in the bowl. Let’s break down the building blocks that turn simple components into something extraordinary.

Key Ingredients for a Rich Flavor
Choose salted butter for browning—its caramelized milk solids amplify nutty depth. If using unsalted, double the added salt. The sugar duo matters: granulated creates crisp edges, while light brown sugar adds moisture with molasses warmth.
One whole egg binds everything without drying, and a splash of milk replaces moisture lost during butter browning. For chocolate, combine chopped 55% dark bars with standard chips. The mix creates molten pools and satisfying texture contrasts.
Must-Have Kitchen Tools
These essentials prevent kitchen headaches:
- A light-colored saucepan (lets you see butter browning clearly)
- Rubber spatula (scrapes every golden drop from the pan)
- Cookie scoops (ensures uniform dough portions)
Don’t skip parchment paper—it prevents sticking without altering flavors. A hand mixer incorporates air properly, while heavy baking sheets distribute heat evenly for consistent results.
Understanding the Science Behind Brown Butter
What transforms ordinary cookies into extraordinary bites? The answer lies in chemistry. Let’s explore how simple dairy becomes flavor alchemy through controlled heat.

How Browning Unlocks Hidden Depths
Regular butter contains three key components: milk fat (80%), water (18%), and milk solids (2%). When heated, these elements separate. The water evaporates, leaving proteins and sugars to react at 250°F-300°F. This Maillard reaction creates 50+ new flavor compounds – think toasted hazelnuts meets caramelized sugar.
Milk Solids: The Flavor Architects
Those tiny brown specks in browned butter? They’re concentrated milk proteins and lactose. Through thermal decomposition, they develop umami-rich flavors that balance sweetness. A 140g portion loses 18% weight as water disappears, intensifying the remaining components.
| Component | Regular Butter | Browned Butter |
|---|---|---|
| Milk Fat | 80% | 83% |
| Water | 18% | 0% |
| Milk Solids | 2% | 17%* |
| Flavor Compounds | 12 | 57+ |
*Concentrated through water loss
This transformation explains why recipes using browned butter require less added liquid. The intensified flavors pair perfectly with bittersweet chocolate, creating balance in every bite.
Mastering the Art of Browning Butter
I’ve burned more butter than I care to admit, but each mistake taught me precision. This golden elixir demands attention to detail—one distracted moment can shift flavors from nutty bliss to acrid disappointment. Let’s break down the method that turns simple dairy into liquid luxury.

Step-by-Step Brown Butter Technique
- Start cold: Cube 1 cup (227g) of salted butter, then melt in a light-colored saucepan over medium heat. Stir constantly with a rubber spatula—this prevents hotspots.
- Listen for clues: After 3 minutes, the mixture will hiss as water evaporates. Foam thickens into a pale blanket, hiding the magic beneath.
- Watch closely: At 6 minutes, amber specks appear. The aroma shifts from milky to toasted hazelnuts. Remove from heat immediately when flecks turn chestnut-brown.
- Cool strategically: Pour into a shallow bowl. Let rest 10 minutes, then chill 10 minutes in the freezer. Test with a thermometer—34°C/93°F ensures ideal texture for mixing.
Timing is non-negotiable. Let it bubble 15 seconds too long, and bitterness creeps in. Pull too early, and you’ll miss the depth. Trust your nose more than the clock—when that rich, caramelized scent hits, act fast.
Pro tip: Use a stainless steel pan for even heat distribution. Dark pans make visual monitoring impossible, increasing burn risks. Once mastered, this technique becomes second nature—the foundation for cookies that taste like liquid gold.
Combining Flavors: Chocolate, Butter, and Sea Salt
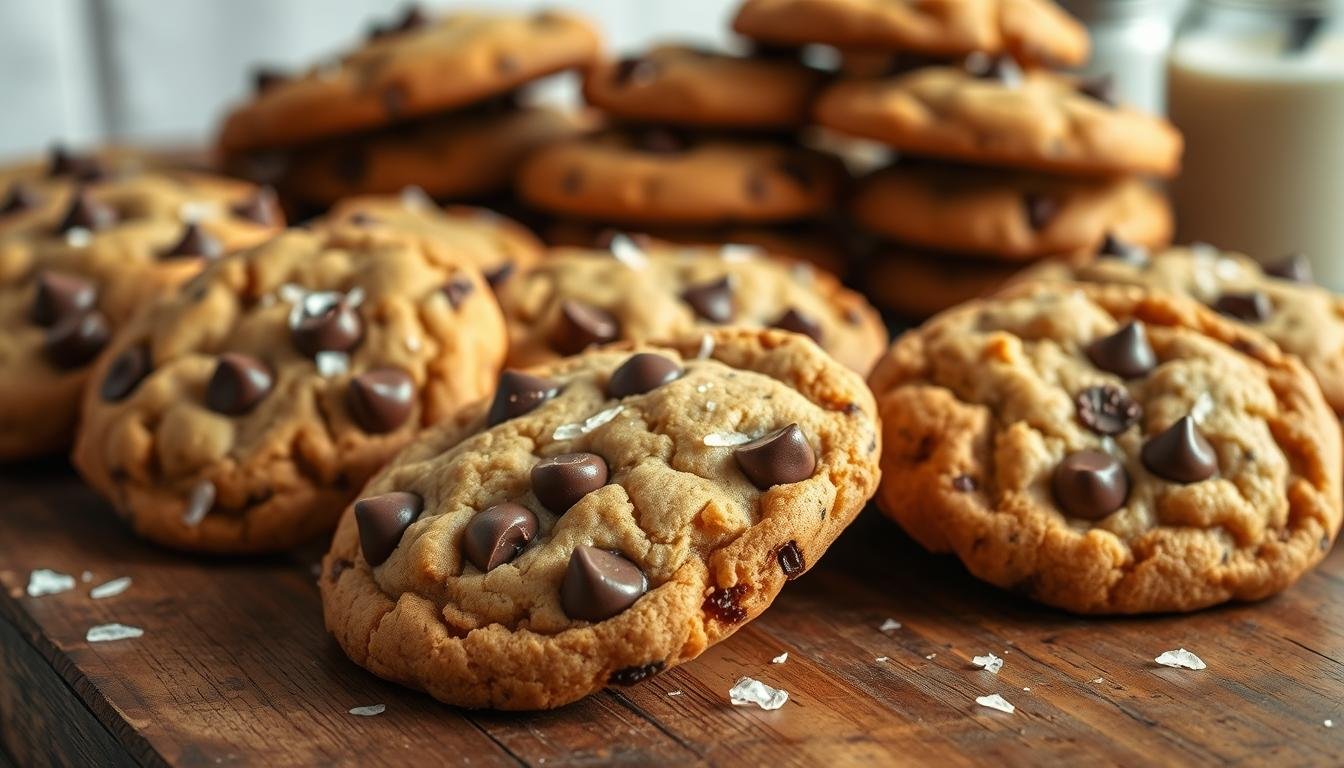
Creating the perfect flavor symphony starts with three key players. Each brings unique qualities that elevate humble ingredients into something extraordinary. The interplay between toasted dairy notes, velvety cocoa, and mineral-rich crystals makes every bite feel like a revelation.

High-quality chocolate behaves differently than standard chips. Couverture varieties melt into glossy pools thanks to their 38-40% cocoa butter content—nearly double cheaper alternatives. I mix chopped bars with classic chips for texture contrast: shards create dramatic streaks, while rounds hold their shape.
| Chocolate Type | Cocoa Butter % | Melting Quality | Flavor Intensity |
|---|---|---|---|
| Couverture | 38-40 | Glistening pools | Balanced |
| Semi-Sweet | 32-35 | Soft melt | Mild sweetness |
| Dark (55%) | 28-30 | Firm hold | Bold bitterness |
A 2:1 ratio of semi-sweet to dark pieces prevents bitterness from overpowering the caramelized butter notes. This balance lets both components shine without competition.
Flaky sea salt acts as the conductor. Its delicate crunch and briny pop amplify the chocolate’s fruity undertones while tempering sweetness. Sprinkle it immediately after baking—heat activates the crystals, embedding them into the surface like flavor magnets.
brown butter chocolate chip cookies, best chocolate chip cookie recipe,

What defines a truly exceptional cookie? While countless variations exist, this formula achieves what others miss: harmony. Unlike overly sweet versions that drown in sugar, these treats let toasted dairy notes lead. The reduced sugar content—15% less than standard recipes—does more than balance flavors. It compensates for the natural spread caused by browned butter’s moisture loss, ensuring ideal thickness.
Hand-mixing proves critical here. Vigorous electric beaters incorporate too much air, creating cake-like textures. A wide spatula gently folds ingredients, preserving the dough’s density. This method yields edges that shatter delicately while maintaining centers soft enough to bend without breaking.
Compare this to popular alternatives:
- Bakery-style versions often taste one-dimensional
- Classic recipes lack depth beyond vanilla sweetness
- Gluten-free adaptations sacrifice chewiness
Every element serves a purpose. The precise flour-to-fat ratio prevents dryness without muting the caramel undertones. Chopped chocolate melts into glossy ribbons rather than disappearing into the dough. Even the baking sheet’s material matters—thick aluminum ensures consistent heat distribution for uniform results.
This isn’t just another “good enough” formula. It’s engineered for bakers who crave complexity in every bite. The kind where friends ask, “What’s different about these?” before reaching for thirds.
Step-by-Step Guide to Crafting Cookie Dough
Building exceptional dough requires more than measurements—it demands rhythm. Like a baker’s waltz, each step connects through precise timing and tactile awareness. Let’s transform raw ingredients into a masterpiece that bakes with intention.
Mixing, Folding, and Chilling Methods
Start with cooled golden-hued butter (34°C/93°F) and combine with sugars. The mixture should resemble damp beach sand—gritty yet cohesive. Add eggs, milk, and vanilla using swift strokes. Overmixing here creates excess air, leading to uneven rise.
“Treat the dough like silk—handle gently, and it’ll reward you with tenderness.”
Incorporate dry ingredients using the fold-and-swipe method: scrape the bowl’s sides, then rotate the spatula through the center. Stop when faint flour streaks remain. This prevents gluten overdevelopment, keeping textures soft.
| Mixing Style | Speed | Texture Result |
|---|---|---|
| Vigorous Beating | High | Dense, cake-like |
| Gentle Folding | Low | Chewy, layered |
| Partial Mixing | Medium | Crisp edges, soft center |
How to Incorporate Chocolate Chunks Perfectly
Add chunks when 10% flour remains unmixed. This coats them lightly, preventing sinking during baking. Use a combination of sizes:
- Large shards (for molten pockets)
- Standard chips (structural support)
Chill dough for 90 minutes minimum. This hydrates the flour fully and solidifies fats, reducing spread. Cold dough bakes with controlled rise—edges crisp while centers stay supple. If mixture hardens too much, let sit at room temperature for 7 minutes before scooping.
Achieving the Ideal Texture: Crispy Edges and Chewy Centers
The difference between good and extraordinary lies in microscopic reactions. Let’s explore how heat and chemistry craft textures that dance between crunch and melt.
Mastering the Spread Equation
Baking soda acts like a conductor here. When mixed with brown sugar’s molasses, it creates alkaline conditions that accelerate Maillard reactions. This builds deeper flavors while influencing thickness.
| Baking Soda | Spread | Texture Profile |
|---|---|---|
| ¾ tsp | Wider, crispier | Lace-like edges |
| ½ tsp | Compact, thicker | Dense chew |
Higher oven temps (375°F) work magic with browned butter’s low moisture. The heat sets edges before dough spreads too thin. Chilled dough bakes slower, giving centers time to stay soft.
Three proven methods for consistency:
- Portion dough with a #20 scoop (3 tbsp)
- Freeze portions 15 minutes pre-baking
- Space mounds 3″ apart on cool sheets
Cold fat melts gradually, creating lift without collapse. For extra height, roll dough balls tall instead of round. This technique builds vertical structure as they bake.
Enhancing Flavors with High-Quality Ingredients
The magic of unforgettable baking lies in the details you can taste. While technique matters, your components determine whether flavors sing or fall flat. Let’s explore how three humble elements elevate simple dough into something extraordinary.
Selecting the Best Chocolate and Salt
Pure Madagascar Bourbon vanilla extract forms the aromatic backbone. Its floral complexity outshines artificial alternatives, adding warmth without overpowering. For chocolate, I blend chopped bars with standard pieces. High-cocoa tablets melt into silky pools, while chips provide textural contrast.
Flaky sea salt isn’t just garnish—it’s a flavor amplifier. A pinch sprinkled post-baking brightens rich notes and balances sweetness. Avoid fine grains; their sharpness can dominate. Instead, opt for delicate crystals that dissolve slowly, creating bursts of savory depth.
Every ingredient should earn its place. When combined thoughtfully, they transform basic recipes into experiences worth savoring—one nuanced bite at a time.